
ACCESSORIES
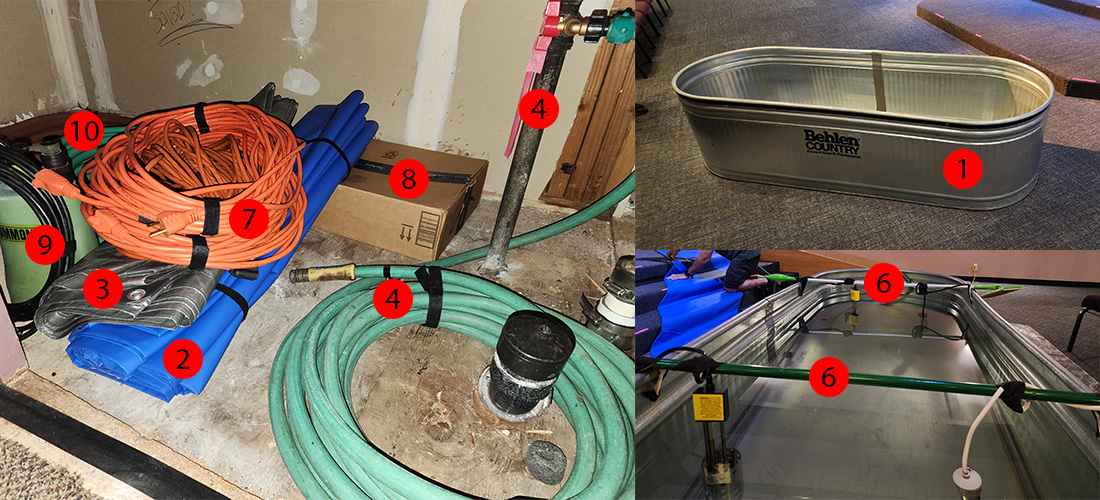
1. STEEL TUB: used for the actual baptism that people get baptized inside it.
2. BLUE CARPET/TARP: used to protect the carpet from getting wet.
3. GRAY TARP: used underneath the steel water tub.
4. WATER HOSE: used to fill the steel tub with water.
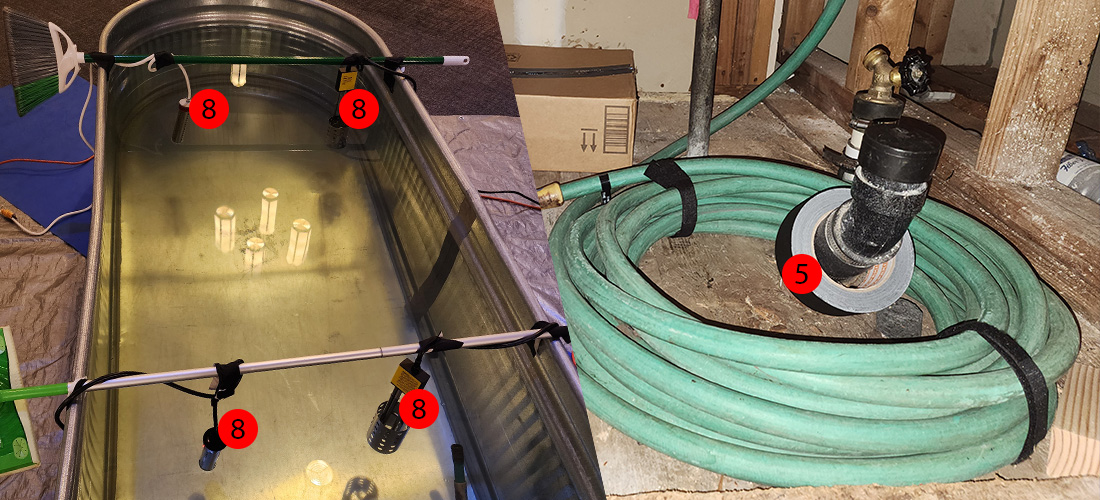
5. TAPE: used to tape down the blue carpet.
6. RODS FOR THE WATER HEATERS: used to hold the water heaters.
7. POWER EXTENSION CORDS: used for the water heaters.
8. WATER HEATERS: used to warm up the water.
9. WATER SUCTION PUMP: used to extract the water out of the steel tub.
10. HOSE FOR THE WATER SUCTION PUMP: used for the water suction pump.
Accessories’ Locations
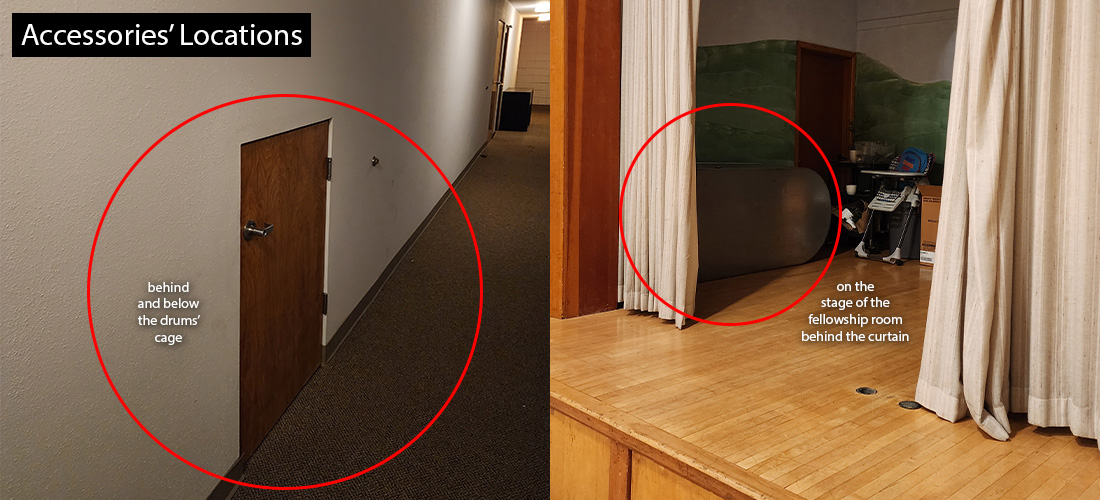
Most of the Accessories are located below the drums’ cage, and the half-door to it is next to the door that goes inside the drums’ cage, behind the main sanctuary, behind the stage, from the outside hallway.
The steel water tub is located on the stage of the Fellowship Room, behind the left curtain, at least that was the case at the time of the writing of this web page.
THE PROCESS
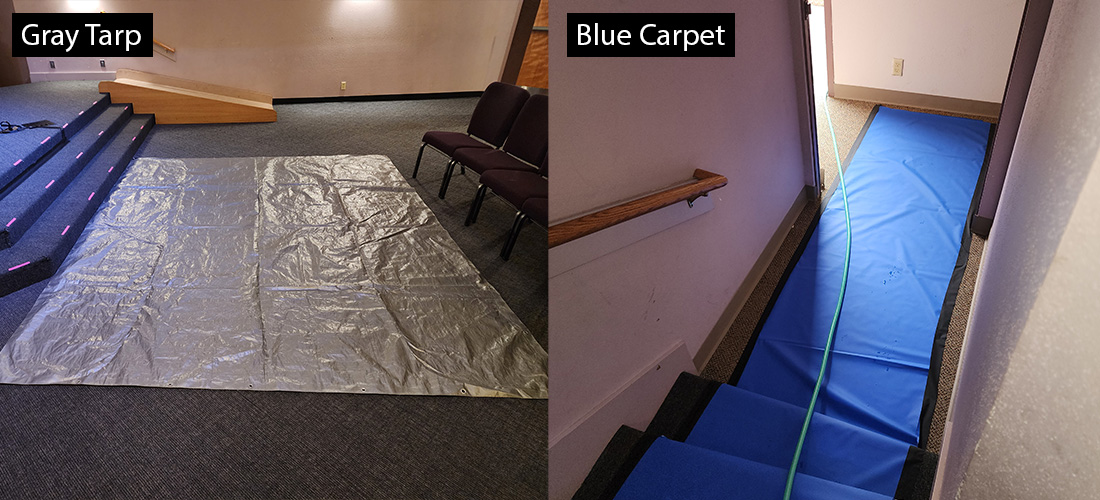
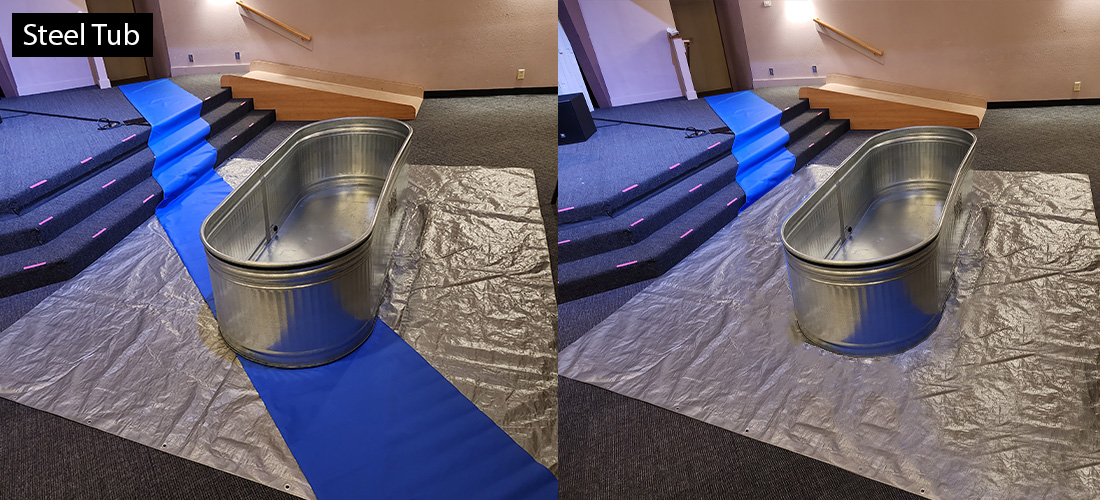
A. Gray Tarp > Blue Carpet > Steel Tub
– Place the Gray Tarp (3) next to the ramp in from of the stage, toward it’s right side like you see in the image above.
– Lay the Blue Carpet (2) starting from the outside wall coming toward the sanctuary.
– The more esthetic look is to have the Blue Carpet (2) under the Gray Tarp (3) like you see on the right side of the image above, but either way works (left side of the image above).
– Place the Steel Water Tub (1) on the Gray Tarp (3), or the Blue Carpet (2) and the Gray Tarp (3) like you see in the image above.
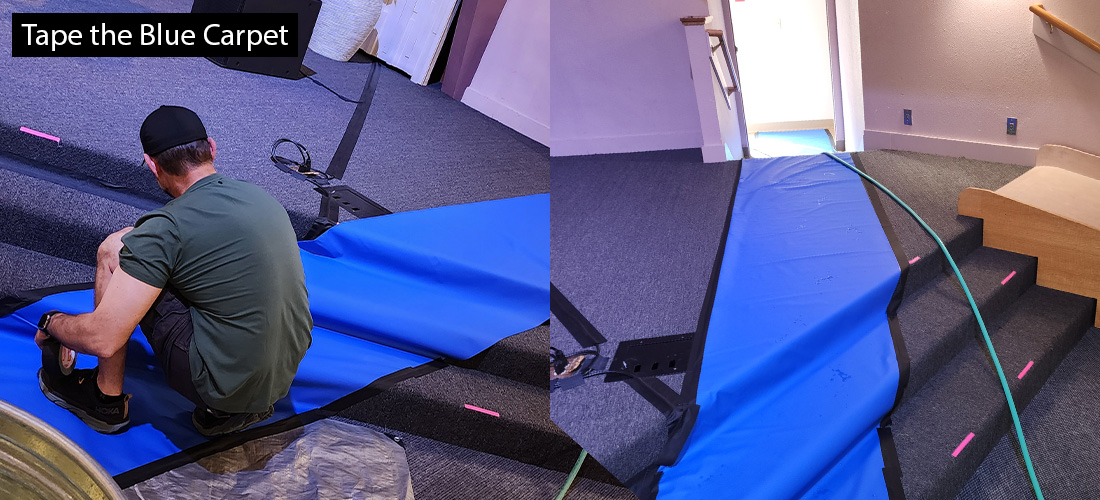
B. Tape the Blue Carpet to the Floor
– Use the Tape (5) to hold the Blue Carpet (2) down like you see in the image above – this makes sure the people won’t stumble on it and it is held in place.
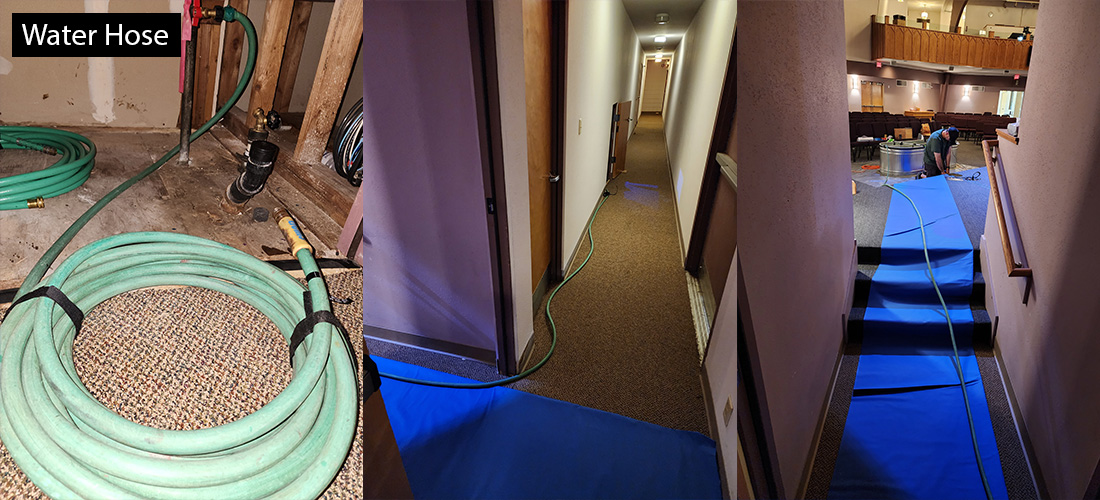
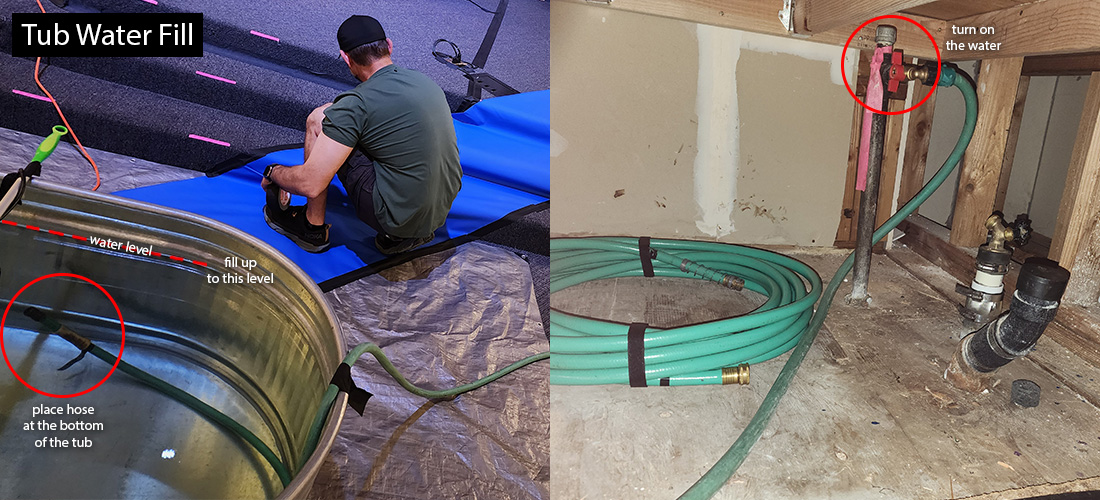
C. Fill the Steel Water Tub with Water
– Unwrap the Water Hose (4) and extend it out from the under-drums-cage to the sanctuary where the Steel Water Tub (1) is, like you see in the image above.
– Tape the end of the Water Hose (4) to the Steel Water Tub (1), like you see in the left side of the image above, so that it is kept toward the bottom of the tub.
– Turn the water on, like you see in the right side of the image above, until the water rises up the the level showed in the left side of the image above (pretty much when it reaches the bottom side of the inside bump of the tub).
– When the water reaches the desired level, shut the water off > un-tape the Water Hose (4) from the Steel Water Tub (1) > take that end you un-taped of the Water Hose (4) outside the building > try to drain all the water from the Water Hose (4) by lifting the Water Hose (4) up above your head, starting from the under-drums-cage and keeping it up, while walking, until you reach the other end of the hose which should be outside somewhere, where the water can leak freely.
– Wrap the Water Hose (4) nicely and put it back under-drums-cage where you initially found it.
D. Install the Water Heaters > Heat Up the Water for 4-5 Hours
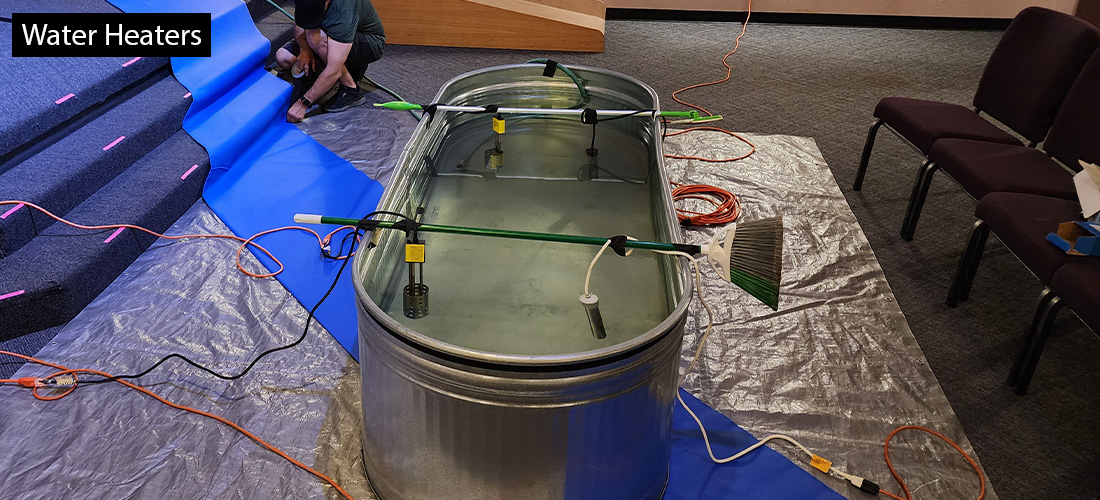
– Use the two Rods (6) to hang the Water Heaters (8) as you see in the images above.
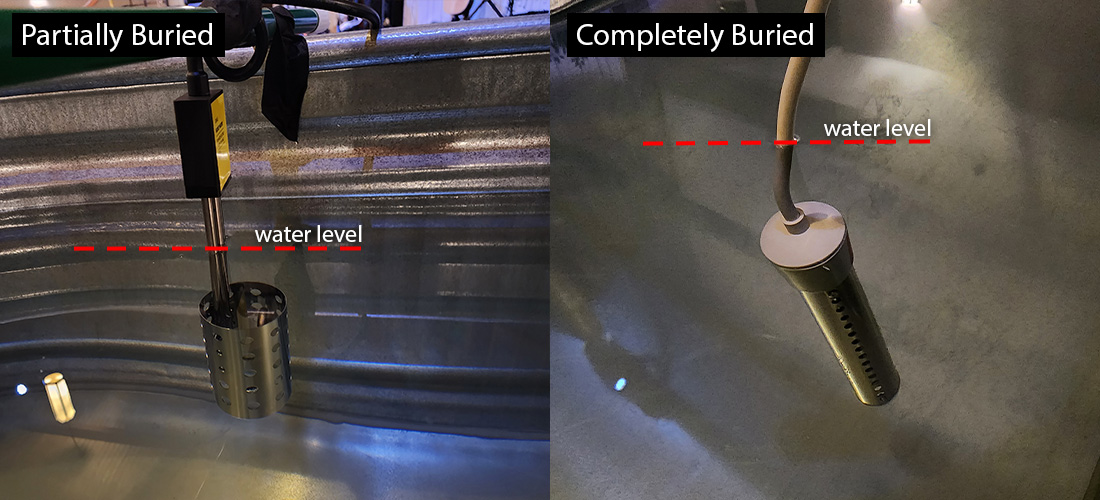
– There are 2 types of Water Heaters (8), as you can see in the images above, and the white and black water heaters have to be completely immersed into water, like you see in the right side of the image above, but the round-fence-looking-like water heaters you see in the left side of the image above, should not be completely immersed into water, but only the bottom section of it without the black plastic part of it.
– Make sure you Tape (5) the Water Heaters (8) to the Rods (6) so they stay in place and not move > make sure you leave some distance between them, like you can see in the images above.
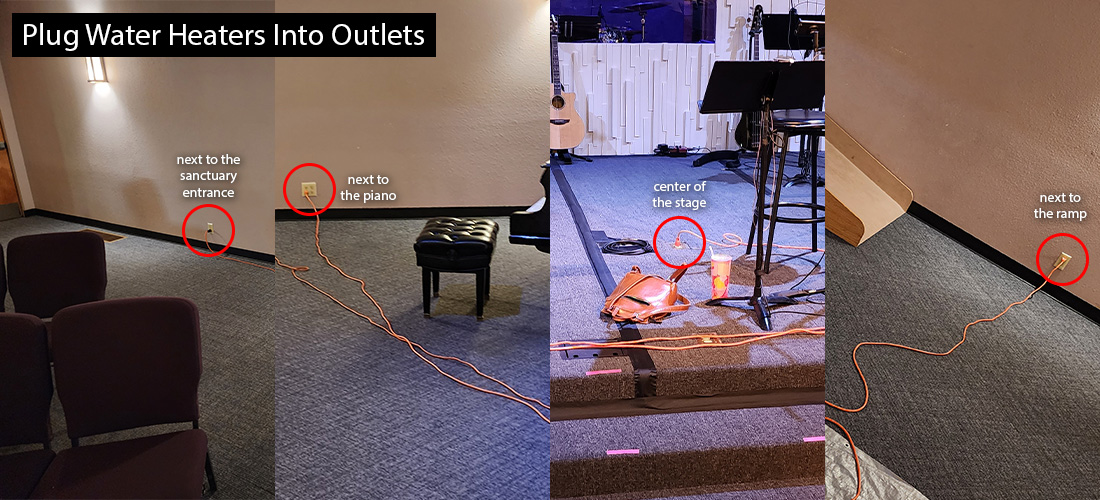
– Use the Power Extension Cords (7) to plug each individual Water Heater (8) into a different outlet throughout the sanctuary, as you can see in the image above, to make sure they won’t end up on the same circuits and jump them > you can see the outlets locations marked in the image above.
– Do Not leave the Water Heaters (8) plugged in more than 5-6 hours, because they are strong enough to start broiling the water and it is not safe.
– When the heat reached the desired temperature (after 4-5 hours), unplug the Water Heaters (8) > un-tape them from the Rods (6) and remove the two Rods (6) from the tub > put the Water Heaters (8) back into their individual boxes and all the boxes in the big box > wrap nicely the Power Extension Cords (7) > put them Water Heaters (8) box and the Power Extension Cords (7) back under-drums-cage where you took them from.
– Use your arm to mix the water inside the tub to make it have the same temperature everywhere inside the tub.
E. Baptism
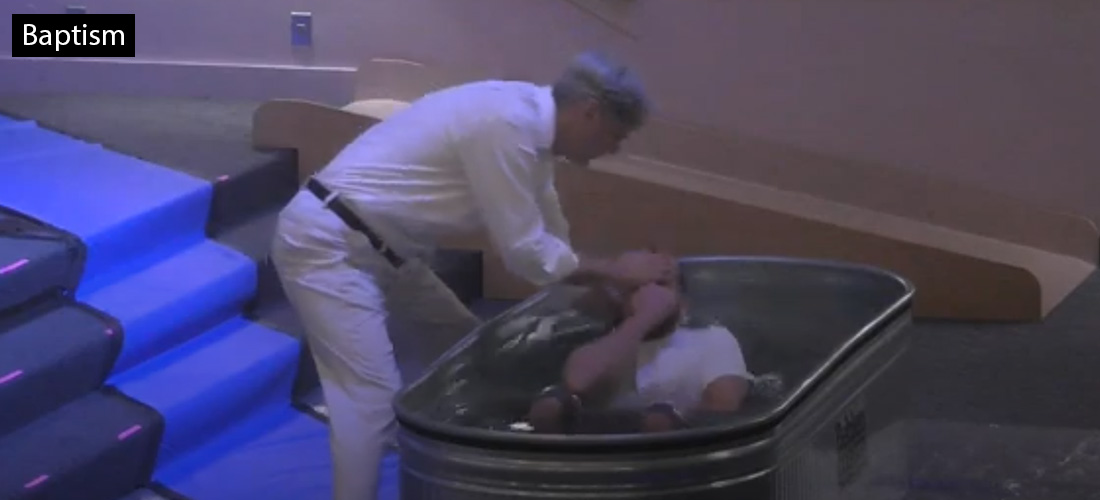
– You’re ready for the baptism now: the one who baptizes stands outside the tub and the one being baptized inside of it in a sitting position.
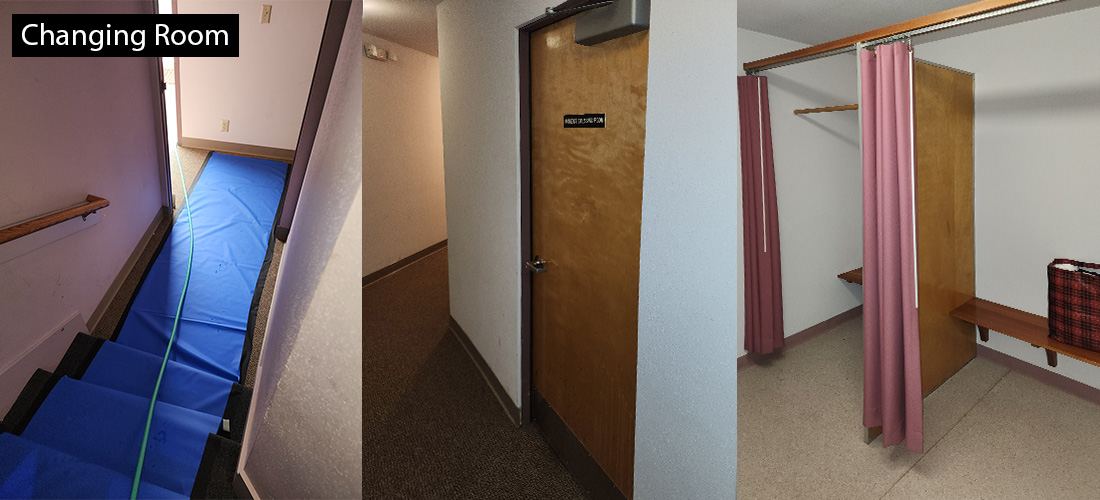
F. The Changing Room
– After the baptism, walk on the Blue Carpet (2) exiting the sanctuary, and make a right in the hallway, like in the image above > the 2nd door on your right will be the “Women’s Dressing Room” > enter the room and use one of the compartments to change, like you see it on the right side of the image above.
CLEANING UP
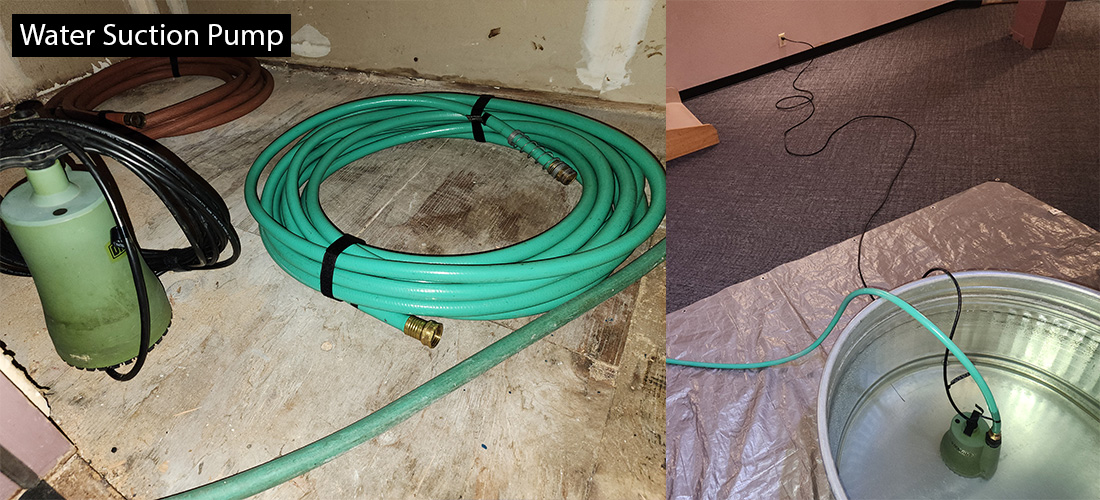
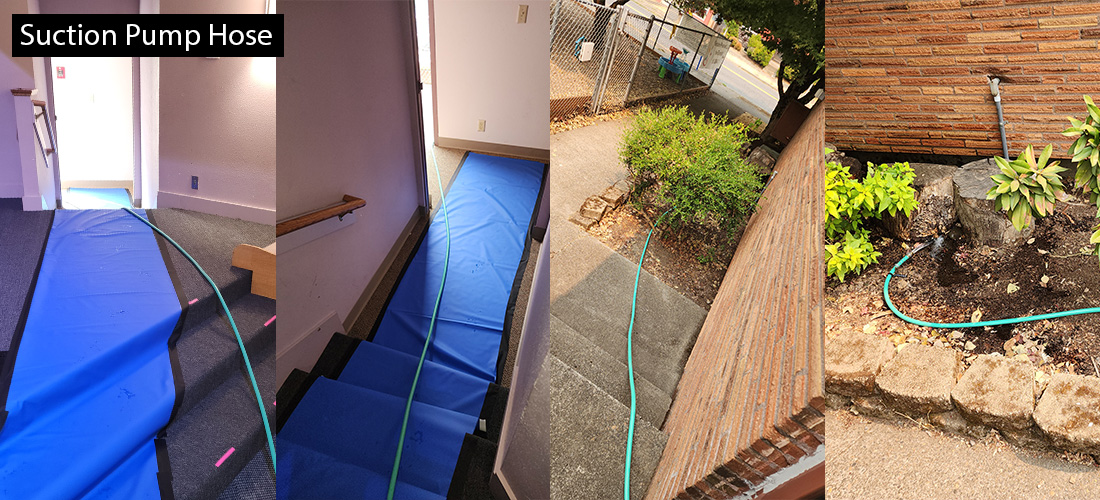
A. Water Suction Pump Installation
– Get the Water Suction Pump (9) and the Water Suction Pump Hose (10) for it from under-drums-cage.
– Unwrap the Water Suction Pump Hose (10), connect it to the Water Suction Pump (9).
– Place the pump in the water in the Steel Water Tub (1), like you see in the image above – Do NOT plug it in yet.
– Run the Hose outside the building, like you see in the image above.
– Plug in the Water Suction Pump (9) in the outlet, and it will start draining the tub and push the water outside the building, like you see in the image above.
– When the water is completely drained form the tub, unplug the Water Suction Pump (9) from the outlet – Do Not let it run without water because it heats up the motor and burns it.
– Unplug the hose form the pump and lift up the unplugged end of the hose above your head to force the water to drain from the hose toward the other end that’s outside.
– Start walking toward the outside, with the hose above your head, while nicely wrapping the hose, draining all the water from the hose, until you reach the other end of the hose that’s outside.
– Take the pump outside the tub and drain it of water > put the Water Suction Pump (9) and the Hose (10) back under-drums-cage where you got them from, nicely wrapped like you found them.


B. Take Everything Back > Last Checkup
– Wipe the tub with a piece of cloth making sure it’s dry and take it back to the Fellowship Room’s Stage behind the left curtain, or wherever you took it from initially.
– Wrap the Blue Carpet (2) and the Gray Tarp (3) and put them back under-drums-cage where you took them from initially.
– Make sure you have all the Accessories, from (2) to (10), are under-drums-cage where you found them initially, like you see in the images above
– Make sure the Steel Water Tub (1) is in its place, where you took it from initially.
